Article

8min read

Alpha vs. Beta Testing: What are the Differences?

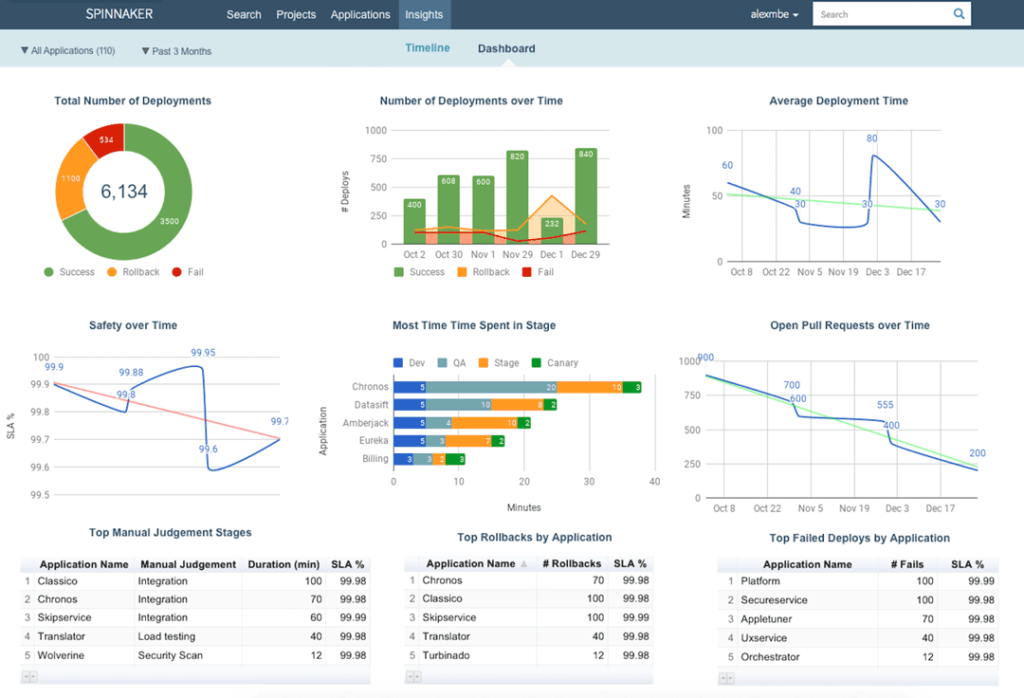
Prior to the launch of a product, a number of tests are usually run to ensure that a software is ready for release and provides a good user experience. The purpose of these tests would be to validate the software before going ahead with a final release to your end-users.

These sorts of tests are essential to make sure that the software you’re releasing is free of bugs and meets the quality and requirements expected by your customers.

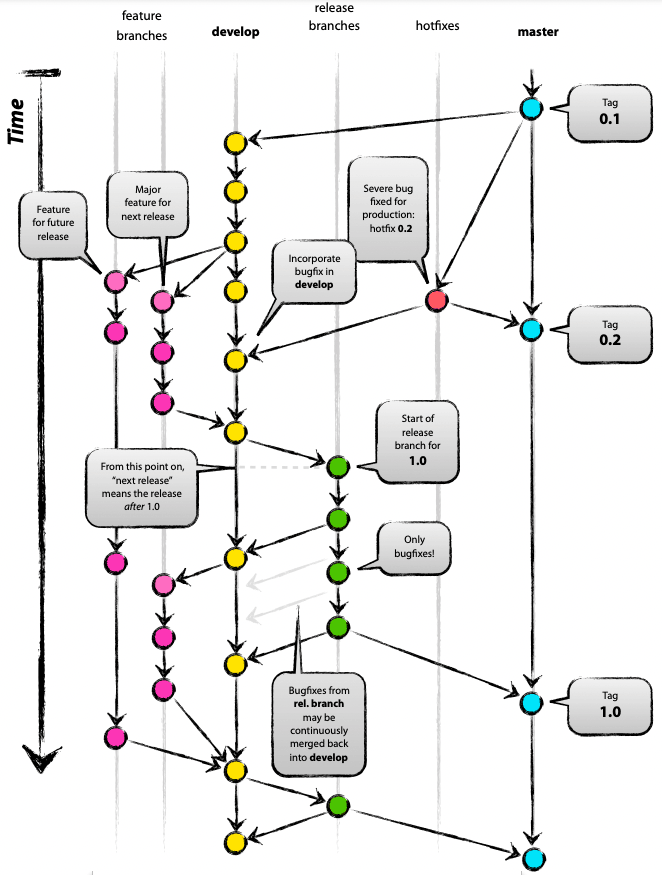
Among such tests are alpha and beta tests. These tests are conducted towards the end of the software development life cycle (SDLC) to test releases outside the development team to help uncover any issues that would otherwise not show up in previous tests that are run in more controlled environments.

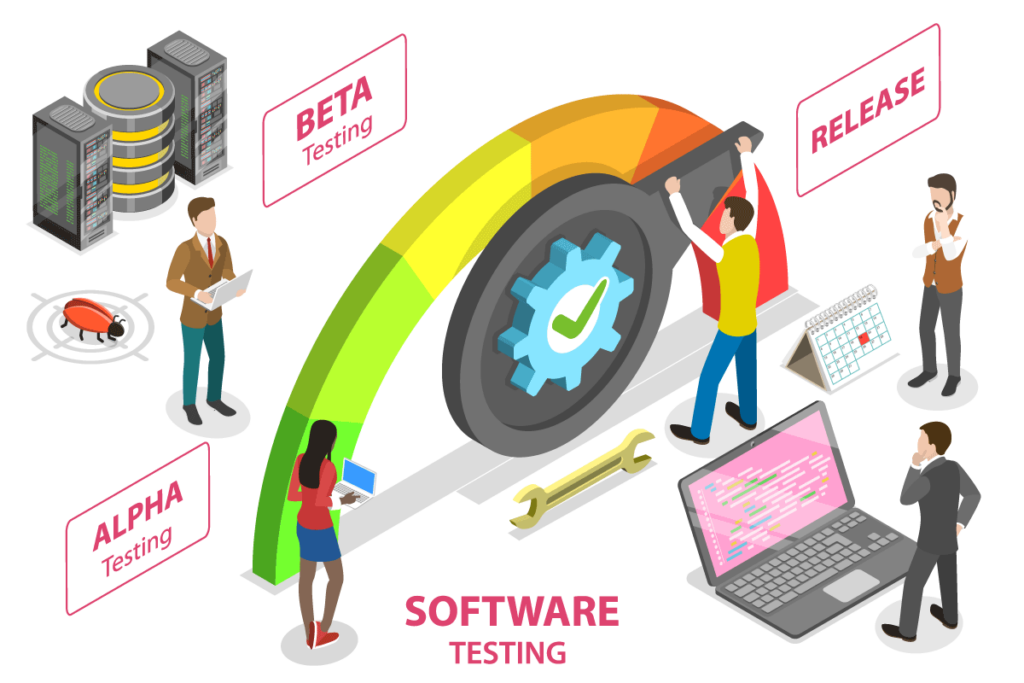
What is alpha testing?

Alpha testing is typically run on internal users by the QA team (Quality Assurance) to make sure that the software meets all expectations and is working as it should. Thus, it represents an opportunity to evaluate the performance and functionality of a product release as well as obtain feedback from technical users.

In other words, the main purpose of this test is to uncover any bugs or issues to resolve them before the final product is released to users. It helps ensure bug-free functionality by carrying out tasks that a typical user may perform.

This test is usually performed when your product is nearly complete towards the end of the software development cycle in a staging environment, which attempts to mimic an actual production environment as closely as possible, but before beta testing, which we’ll get to later.

It seeks to answer the question whether your product actually works.

Alpha testing involves two main phases:

  • The first phase is run by software developers using debugging tools or software to catch bugs quickly.
  • The second phase is performed by the QA team and may involve ‘white box’ and ‘black box’ testing. A white box test will test the software system’s design and internal structure allowing QA testers to ‘look inside’ the product. A black box test, meanwhile, will test the system’s input and output functionality. 


The advantages of this type of testing are clear.
 

It allows teams to locate bugs and issues that managed to escape previous tests so that they may be fixed before they reach your end-users. 

Up until that point, tests were focused on testing specific parts of the software but alpha testing, on the other hand, looks to see if the software as a whole functions correctly.

In other words, it enables teams to validate the quality and functionality of their releases before it is released to customers. Put simply, Alpha testing opens up the application to receive initial feedback.

This results in improved software quality as the software is tested in an environment that is a very close replica of the environment it will eventually be used in, hence creating realistic testing conditions. This also allows the QA team to understand how the software will behave when it is later released to end-users.

To sum up, alpha testing provides an opportunity to put your product in real user environments but with technical users who are more adept at identifying and discovering bugs before conducting beta tests with actual real-world users.

However, conducting alpha testing may prolong the test execution cycle thereby delaying the release of the product to your end-users. Also, keep in mind that since the software is still in the development stage, alpha testing doesn’t provide in-depth testing of the functionality of the software.

Now, we will move on to the next testing phase, beta testing.

What is beta testing?

Beta testing involves releasing the software to a limited number of real users external to the organization. As a result, this type of testing is done in a production environment.

These users will then be asked to provide their feedback on the release, also named “beta version”. Beta testing, then, is an opportunity that allows users to test out the product to uncover any bugs or issues related to user experience (UX) before it is rolled out to the rest of your users.

In other words, it represents the final stage of testing before releasing the product to a wider audience. 

It also enables teams to run security and reliability tests as those tests cannot be conducted in a staging or lab environment.

There are many ways to implement beta testing. For example, often, companies will ask a select number of users to willingly op-in to get early access to the software. The advantage of this is that these users will be aware that the beta version may not be very stable and so they are more forgiving of any potential bugs and are happy to provide the feedback you need to optimize your product.

To be more specific, you may go for a closed or open beta test. In an open test, anyone can use the product but users are given a clear indication that the product is a beta version so they know that it’s still a work in progress. 

Meanwhile, in a closed test, as in the example given above, the testing is limited to a specific set of users, which would be by invite only. These users would be composed of early adopters, current customers or even paid beta testers.

Such exclusivity is one way to build close relationships with specific users as you are demonstrating that you value their opinion in particular before doing a wider release.

The advantage of this testing is clear. It is the first chance to test how the software will behave in real-world settings and observe how your end-users interact with it and what the user experience looks like.

Product managers, in particular, can make use of the feedback received to collect ideas and suggestions when planning future releases.

Beta testing is a way these managers can observe usage behavior and analytics to confirm that users are interacting with the product as expected. They may also run experiments and A/B tests of features to decide which one to choose for a general release. 

This, in turn, allows developers to uncover any bugs in real production and less controlled environments so that they may be fixed before a full launch.

Many bugs may have been discovered during alpha testing by your internal users but nothing can truly simulate real world users, which is why beta testing is necessary after alpha testing.

However, as we’ve seen, beta testing is conducted in real environments as opposed to controlled environments during alpha testing and so the former is more difficult to control.

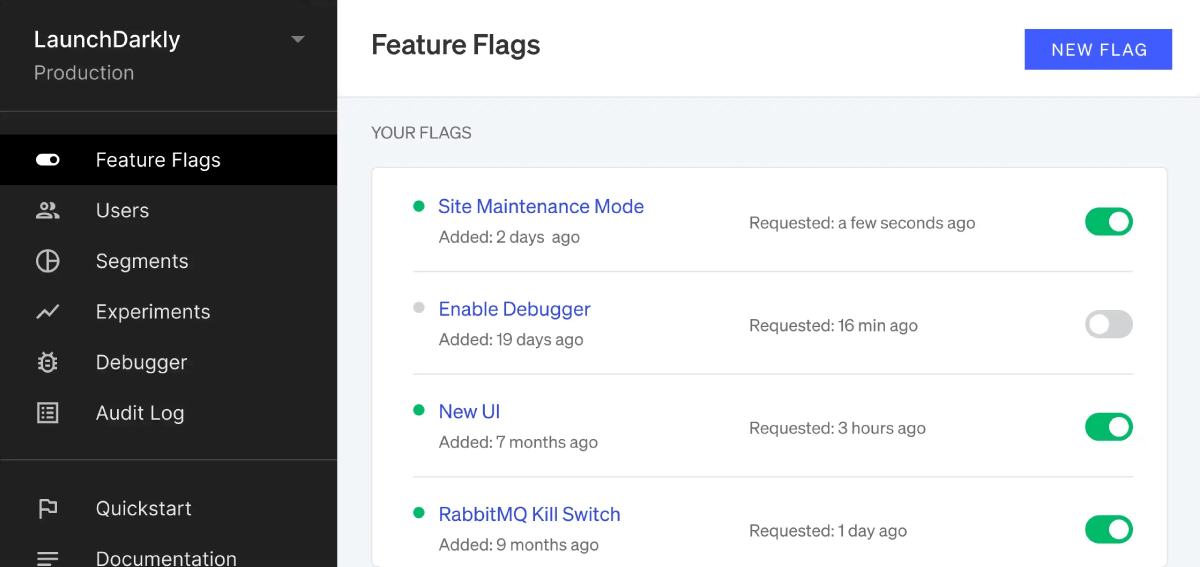
Feature flags and beta testing: safer testing in production

During beta testing, you are essentially testing in production, which doesn’t come without its risks but luckily there is a way to mitigate those risks: by using feature flags.

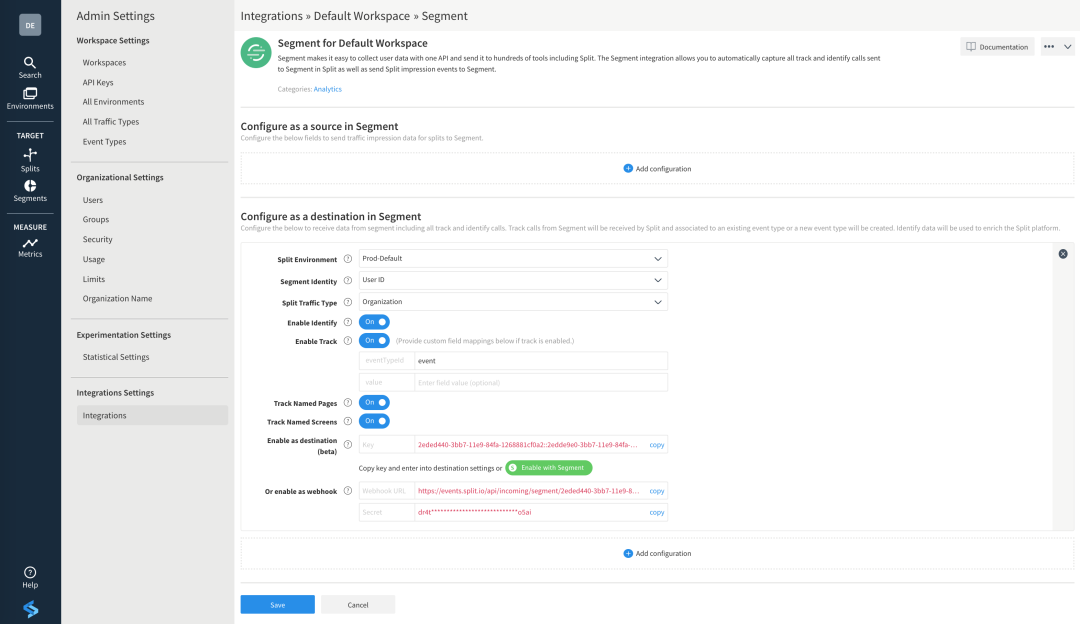
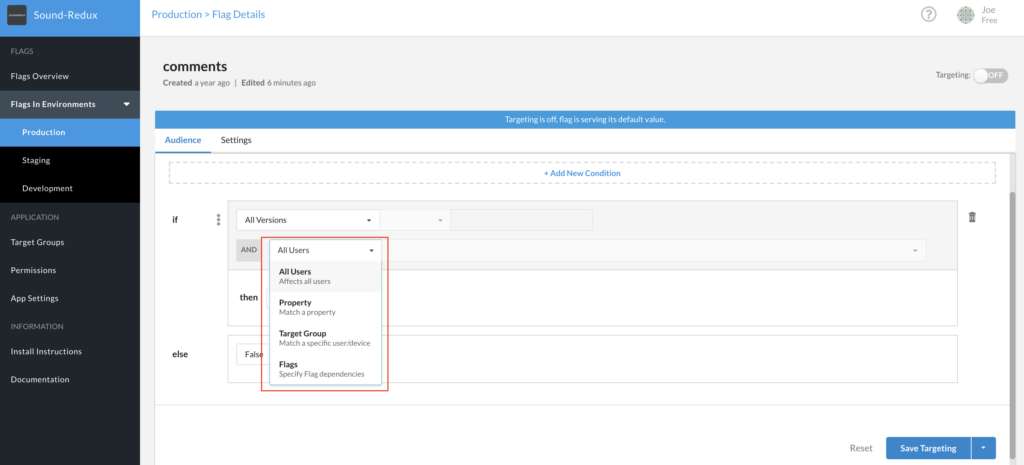
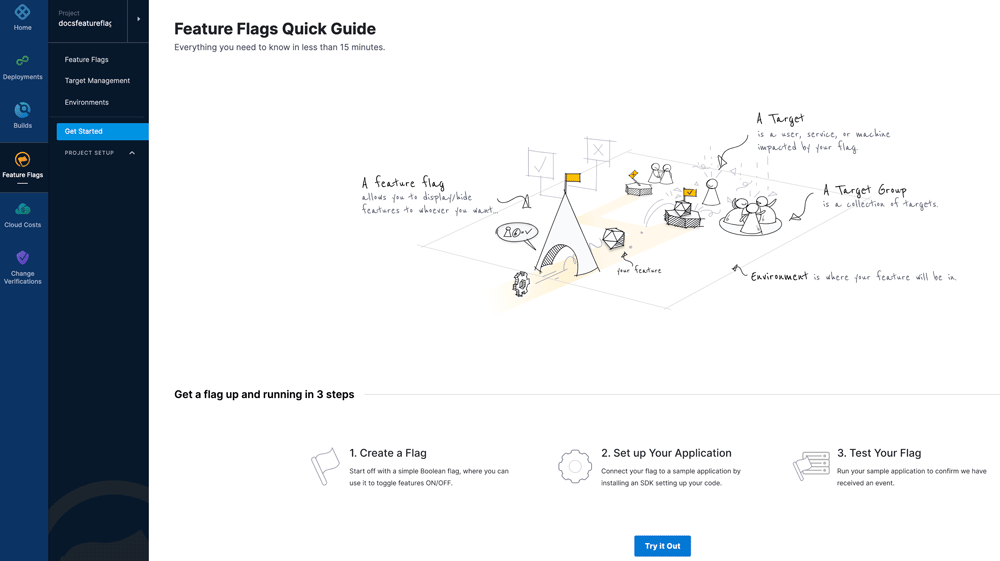
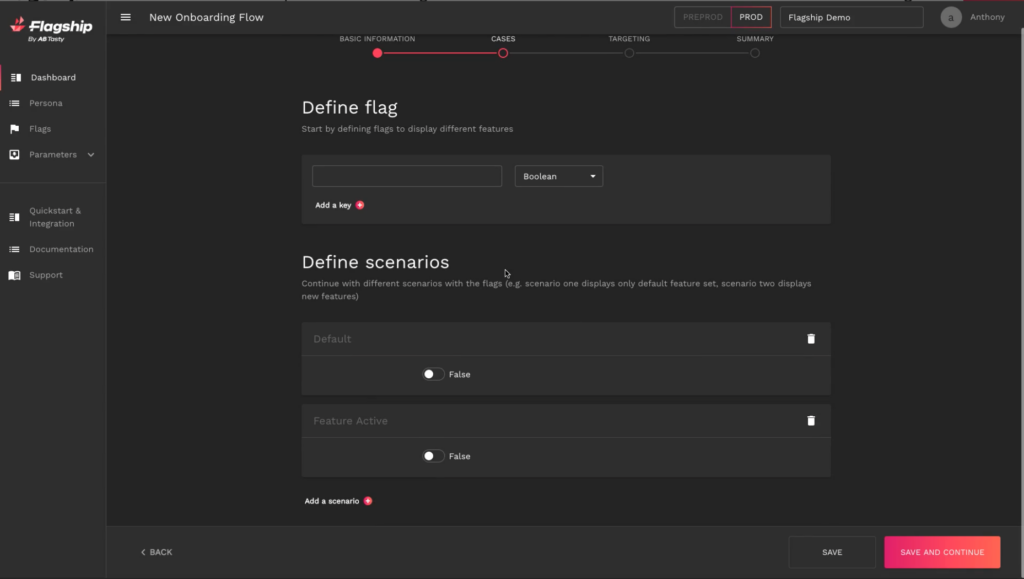
A feature flag is a software development tool that helps decouple deployment from release, giving you full control over the release process. With feature flags, you can perform beta tests by enabling features for certain users and turning them off for everyone else.

Feature flags also act as a kill switch so that you can gradually roll out features to users to test performance and if something goes wrong, you can just as easily roll it back or turn off the buggy feature.

Feature flags are a great way for all teams within an organization to carry out beta testing as using feature flags for beta testing means even non-technical users such as product and marketing teams can turn on features for specific users, which means they’re not so reliant on development teams anymore.

Alpha vs beta testing

The major advantage of such types of testing is that it helps the development team to identify issues in advance before it goes to launch, allowing them to fix these issues early on before going for a full release. 

However, as already alluded to in above sections, there are still major differences between these two types of testing, some of which are summarized in the table below.

 Alpha αBeta β
TestersInternal employeesEnd-users or customers not part of the organization
Environment Requires a specific environment for testingDoes not require a testing environment
What’s testedFunctionality and usability are tested while security and reliability tests are not carried out in depthReliability, security and stability tests are key aspects of a beta test
Testing techniqueUses both white and black box testing techniquesFocuses mainly on black box testing 
WhenRun before the product officially launches to the marketRun after the product is launched
PurposeTest that the product is working as it should to evaluate product qualityUnderstand how real users interact with the product and to evaluate customer satisfaction 
DurationLong execution cycleShort process usually only lasting a few weeks
Post-test actionsAny bugs or issued discovered will be immediately rectifiedMost issues identified and feedback received will be implemented as improvements future versions of the product

Conclusion

Clearly, testing is important to ensure the delivery of high quality, bug-free releases. There are a number of tests carried out throughout a software’s life cycle, each of which serves a unique purpose. 

Read more: all about test environments and the type of tests that may be run as the software is being developed.

Here we looked at two important ones that occur towards the end of a software’s life cycle: alpha and beta testing.

Both alpha and beta tests are an important part of the testing process as they provide a valuable means to highlight crucial issues with your releases and provide user feedback, both internally and externally.

Alpha testing helps validate the quality of your software while beta testing allows you to obtain real-world feedback to ensure you’re building products that your customers actually like.

Therefore, in the testing lifecycle, both alpha and beta testing are essential.

Subscribe to
our Newsletter

bloc Newsletter EN

We will process and store your personal data to respond to send you communications as described in our  Privacy Policy.

Article

9min read

Flutter for Mobile App Development: Overview and Benefits

As mobile usage has increased and spread widely all over the world, mobile apps, as a result, have also risen in popularity. This means it’s important for app developers to stay current on the latest development tools in order to build high quality apps.

There are now many tools out there and if you’ve been keeping up with the mobile development world, you’ve probably already come across Flutter, which has generated a lot of buzz since its release in 2017.

What is Flutter?

Flutter is a free and open-source UI software development kit created by Google. It is used to develop natively compiled, multi-platform applications for mobile, web, and desktop from a single codebase and programming language.

This has greatly contributed to Flutter’s appeal and why it’s become so popular today.

It has been designed to support mobile apps that run on both Android and iOS allowing you to build apps on different platforms from the same codebase. This means, for example, that the code you used to publish your Android app can also be deployed on iOS, the web or desktop with little change.

Moreover, Flutter’s support for desktop devices means you can scale your app to Windows, Linux and Mac and hence reach more users on these platforms’ app stores.

Put simply, Flutter essentially provides a widget-based UI library, including UI elements such as text boxes, buttons and image blocks that can be used to create and personalize your app. 

To give a better visual of the coding process when writing your first app in Flutter, the below image gives a glimpse of a code for a basic Flutter app-everything in the code is a widget:

Source

We will come back to Flutter widgets in a bit but for a deeper understanding of Flutter, it is worth taking a look at its architecture first to understand the concepts that form its design.

Flutter architecture

Flutter consists of two major parts- a framework with a UI library based on widgets, which contains various reusable UI elements, such as sliders, buttons, text inputs, and others, and a software development kit (SDK)- the tools that help develop apps i.e., to compile code into native machine code for the use of iOS and Android.

The following image shows the major components of Flutter, which are organized around layers. This layered, extensible system exists as a series of independent libraries that each depend on the underlying layer.

Flutter Architecture Diagram

The three main architectural layers of Flutter consist of:

  • Framework: Developers interact with Flutter primarily through the Flutter framework, a modern reactive framework written in the Dart language. This framework provides a rich set of libraries that are divided into layers: basic foundational classes, rendering layer, widgets layer and Material and Cupertino libraries. 
  • Engine: In the diagram above, we can see that the next level of Flutter is an Engine written in C++ and which provides low-level implementation of Flutter’s core APIs.
  • Embedder: This platform-specific embedder provides an entry point and coordinates with the underlying operating system to access services such as accessibility, rendering surfaces, and input. The embedder is written in a platform-specific language such as Java and C++ for Android, Objective-C/Objective-C++ for iOS and macOS, and C++ for Windows and Linux.

Flutter uses Dart, also created by Google, for writing code. Dart is a client-optimized language for developing fast apps on any platform with the goal of offering the most productive programming language for multi-platform development.

You can look at Flutter as the front-end UI that you use to develop the app and Dart as the backend code that is automatically generated.

Dart compilers and runtimes support the combination of both just-in-time (JIT) compilation, which provides a faster development cycle and allows for hot reloads of the Flutter app, as well as ahead-of-time (AOT) compilation. AOT compiled programs usually run quicker as they are compiled before execution while JIT programs are executed at or just before runtime. 

Therefore, Dart combines the advantages of both JIT and AOT compilation: fast development cycles, and fast execution and startup times.

Everything on Flutter is a widget

In Flutter, basically everything is a widget, which is the core concept of the framework. Widgets are the building blocks of a Flutter’s app user interface and represent an immutable declaration of part of the user interface. In other words, they declare how a UI should look.

Thus, to build any app in Flutter, you start with a widget. The main underlying idea is that you build your UI out of widgets. Widgets describe what their view should look like given their current configuration and state. It includes a text widget, row widget, column widget, container widget, and many more.

To be more precise, Flutter draws its own widgets and uses the Skia library for rendering UI instead of relying on platform-specific components, which reduces communication between the Flutter apps and the mobile platforms. In other words, as Flutter uses its own rendering engine, UI built in Flutter can be launched on virtually any platform. This ensures consistency of the application interface across all platforms. 

As far as their layout, the widgets within a Flutter app form a hierarchy where a widget is a composition of other widgets and each widget inherits properties from its parent. Widgets, then, are arranged into a tree and nested inside of each other to parent and child widget.

The image below illustrates how the UI is built using widgets:

Flutter has a rich library of pre-built widgets, which speeds up and simplifies the process of creating a UI/UX. It’s also possible to create custom widgets.

There are primarily two types of widgets in Flutter: stateless, whose properties don’t change over time such as Icon, IconButton, and Text, and stateful, which are dynamic in nature such as Checkbox, Radio, Slider, InkWell and Form. 

Furthermore, Flutter has specific widgets specific to a particular platform – Material Design for Android or Cupertino style for iOS.

Benefits

  • Hot reload

Flutter enables faster app development using its hot reload which allows developers to view code changes as soon as they are saved. The changed code can then be reloaded immediately while the app is running and without losing the current application state, which means that developers can make quick changes and see the outcome immediately.

It also makes it easier to test out new ideas and experiment with new features helping boost creativity.

Reload in action

  • Enhanced performance

Unlike other cross-platform frameworks, there isn’t any kind of bridge converting Flutter widgets into the native components, which would slow things down and cause performance issues. Instead, Flutter’s core graphic machine, Skia (a 2D graphics rendering library), compiles the UI to native code without the need for any additional software as the user interacts with the app.

React Native, for example, uses JavaScript as a programming language to build an application and it uses a bridge to communicate with native components, which would affect the overall performance of the app.

As Flutter doesn’t need this bridge, apps built using Flutter run faster than apps developed with React Native.

  • Easy to learn and use

Compared to React Native or Java, Flutter is much easier to learn and use.

As discussed previously, Flutter uses widgets which makes the UI easy to use providing you with all the features you need to build your app.

The language Flutter uses, Dart, is also easy to learn especially for those who have already worked with other popular languages such as Java and C#.

  • Faster development and release time to market

One of the most prominent features of Flutter is its hot reload, as mentioned above. Hot reload allows developers to see changes to their codes almost instantly. In other words, with the Flutter framework, there is no need to recompile the code every time you make a change. This is what largely makes Flutter app development time faster than others.

Furthermore, since developers are working with one code base for both iOS and Android apps, this means they don’t have to write a platform-specific code. Any 2D-based UI can be implemented in Flutter without interacting with a native application counterpart.

Therefore, using a single code base, you can develop one UI design for both iOS and Android, which helps save time and resources.

  • Open to everyone

Flutter is open source and free to use and it also provides extensive documentation and community support in case any issues arise. Because of its rising popularity, Flutter has a fast-growing community of developers who are always ready to share their knowledge and experience so there’s a lot of support out there to help you get set up with the tool.

Flutter vs other app development frameworks

As we’ve seen, Flutter offers many advantages that arguably make it a superior choice to other hybrid development frameworks such as React Native.

There are many things that sets Flutter apart from React Native- things we’ve already mentioned such as the fact that the latter’s programming language, Javascript, requires a bridge to communicate with different native components while in Flutter no bridge is needed and so this ensures faster app development.

Also, the great thing about Flutter that also sets it apart is that it has UI widgets packaged within itself without relying on any third-party tools like React Native, which could affect app performance. In other words, within the Flutter framework, you have everything you need for developing mobile apps. Not to mention that Flutter provides a unified UI experience across all platforms.

Flutter is also ideal if you’re looking to build a minimum viable product (MVP) if you’re short on time using its expansive widget collection.

Many major companies today have used Flutter to develop their apps including:

Google Ads, Alibaba, Hamilton Musical as well as Reflectly (who provide their own take on why they decided to switch from React Native to Flutter). 

To sum it all up…

Flutter is a great choice for mobile app development projects of any size. Because it’s easy to learn and comes with clear and detailed documentation, developers can become acquainted with the Flutter framework quite quickly.

You can even integrate a feature flag solution inside your Flutter app, which will give you more control over your app releases by targeting certain user groups as well as allowing you to easily roll back releases in case anything goes wrong with minimal impact.

Feature flags will allow you to bypass app store validation as with remote config implemented through feature flags, any changes can be made instantly and remotely and then released to a small subset of users to get feedback before releasing it to everyone else. Therefore, you can upgrade your app continuously in real-time based on feedback from your users without waiting on app store approval.

With AB Tasty, you can easily get your Flutter app up and running on our feature flagging platform using our client library with preconfigured methods to implement the Decision API.