Article

9min read

How to Implement Feature Flags in a React JS App

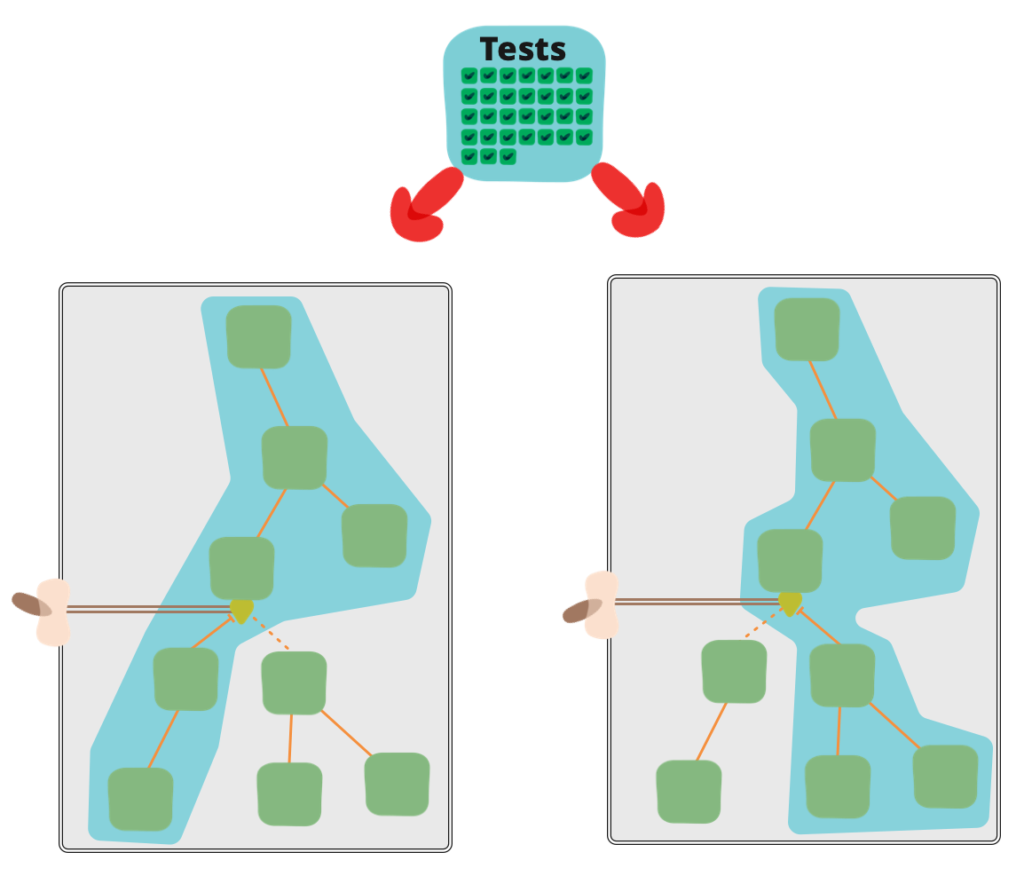
Feature flags, or toggles, as described by Martin Fowler are a “powerful technique, allowing teams to modify system behavior without changing code.” In other words, implementing feature flags as a set of patterns is a robust way to manage code complexity and deliver new features to users using CI/CD (continuous integration/continuous delivery) pipelines, reducing the time to value and decreasing the risk of deploying buggy, error-ridden code to production.

Feature flags are an integral part of deploying software updates via CI/CD pipelines without disrupting existing functionality. There are several ways to implement feature flags in your React apps. Let’s consider three of the most popular and common ways: 

  1. The do-it-yourself method where the developer writes the feature flag code from scratch.
  2. The use of open-source libraries that are integrated into the React Single-Page Application (SPA).
  3. Signing up with a cloud based solution (feature flag as a service).

Do it yourself: A simple and free solution

This method requires you to write code, switching feature flags on and off directly in JavaScript. By expanding on this method, let’s consider a simple use case, including code samples from a feature flag React app project, before looking at the primary pros and cons of this method.

1. Setting up the React project 

If you already have your React project set up, you can skip to the next section, “Adding new feature flags” otherwise, here is a step-by-step guide to setting up a new project. 

The reactjs.org website notes that the create-react-app is the easiest way to develop a new single-page application with React.

Therefore, use the following code to create a new boilerplate app:


npx create-react-app my-app
cd my-app
npm start

2. Adding new feature flags 

Now that we have the project created and an empty app template, let’s look at how to add a feature flag in React.

Feature flags can be stored in different places such as a database server, inside local storage, or in a cookie. In this scenario, we will store them inside local storage. 

The first step is to create a React js feature flag file with the following format used to create new features. This will act as your config file that you’ll update every time you want to turn on/off a specific feature.

Each feature flag must have a unique name that we can later call or reference in React. A short description is also needed to describe the functionality it adds and an active flag to determine whether the toggle is on or off. 

As seen from the code snippet for creating a banner flag, our flags are stored inside an array. 

To store these flags in local storage, add the following function to your app.js file and call it at the top of your feature component file.

Note: This will create 3 new feature flags if there are no feature flags created in local storage (localStorage). You also need to use the JSON.stringify () method to convert the JavaScript objects into strings as localStorage can only handle strings.

3. Adding the feature component

In order to reference these feature flags in React and show/hide features based on these feature flags, you need to create a new React component <Feature />. Define it in a file called feature.js and store it in your src folder.

This component accepts 2 props:

  1. the flag name to check against,
  2. the child content to be used (children prop).

The first step is to get the feature from localStorage and see if it is set to active or not. If the feature is active, we can render the feature; otherwise, we return null. 

This component will handle the toggling of feature flags on and off. Finally, you just import and render the component where you need.

Pros 

There are several advantages to using this method. The most obvious being the fact that when writing your own feature flag code, it is free, easily accessible, and highly available for small React feature toggle projects. 

Cons 

However, what happens when your application grows in scale, and you need to create and manage several different feature flags, both long- and short-lived? 

This is where this method’s disadvantages come to the fore. Succinctly stated, this method is difficult to scale where lots of flags are utilized. And as you can see from the code samples highlighted above, advanced features require more development work which can be challenging and complicated to maintain.

Feature flag open-source libraries for React 

The second method is to use existing libraries that you can find on Github. A simple search will lead you to multiple open-source libraries or packages to do feature flagging. Here are a few examples of these packages for React: 

Flagged, for instance, provides nice features such as:

  • Hooks API
  • High Order Component API
  • Render Props API
  • TypeScript Support
  • Zero Dependencies
  • Nested Flags

Pros

The advantages of using these open-source libraries are that they are freely available, easy to use, and quick to set up. As described above, all you need to do is consume the libraries into your application and then call the functions created in the library files, passing in variables as required and reading returned variables to understand the state of your feature flags.

Cons 

However, as with everything, there are also disadvantages to using open-source feature flag libraries. The most prominent includes the fact that maintenance and evolution are not guaranteed, and the library’s functional scope might not suit your app’s specific requirements. In both cases, a fair amount of refactoring and new code development will have to take place to maintain the existing code and add the features specific to your application.

Feature flag management platforms

The third and last way to implement feature flags in a single-page application is using a dedicated feature flag management 3rd-party service that provides a React integration.

By way of expanding on this statement, let’s look at a step-by-step guide on how to set up feature flags in our server-side solution with the React SDK. As an alternative, you can also directly call the Decision API (REST API), but for the sake of simplicity we’ll use the dedicated SDK that provides additional capabilities out of the box (ex: bucketing). The platform also provides additional SDKs for Java, Python, PHP, .Net, Go, iOS, Android, Flutter

Using our cloud-based feature management service is a 2- step process. First, in your codebase, you wrap your features once with flags using methods and providers from the React SDK. Once this is done, you remotely configure your flags (values, segments…) from the dashboard.

1. Set up the React SDK in your SPA project and wrap features with flags

Let’s use the same project that we created in the first method (Setting up the project) using our create-react-app boilerplate app.

Install the SDK using NPM or yarn.


npm install @flagship.io/react-sdk

Import the our provider from the React SDK which makes the tool’s features available to the rest of your app.  You can wrap your app directly within the app.js file.

The envID and apiKey props are required. You access them from the UI under the “Settings” section. For more information on the different props available, please refer to the API references

Then, from the React component you want to get access to your flags, import and use one of our React Hook. It gets modifications assigned to the current user as well as further functionalities, such as sending hit tracking, checking the SDK status…

2. Declare your flags in the UI and set up values

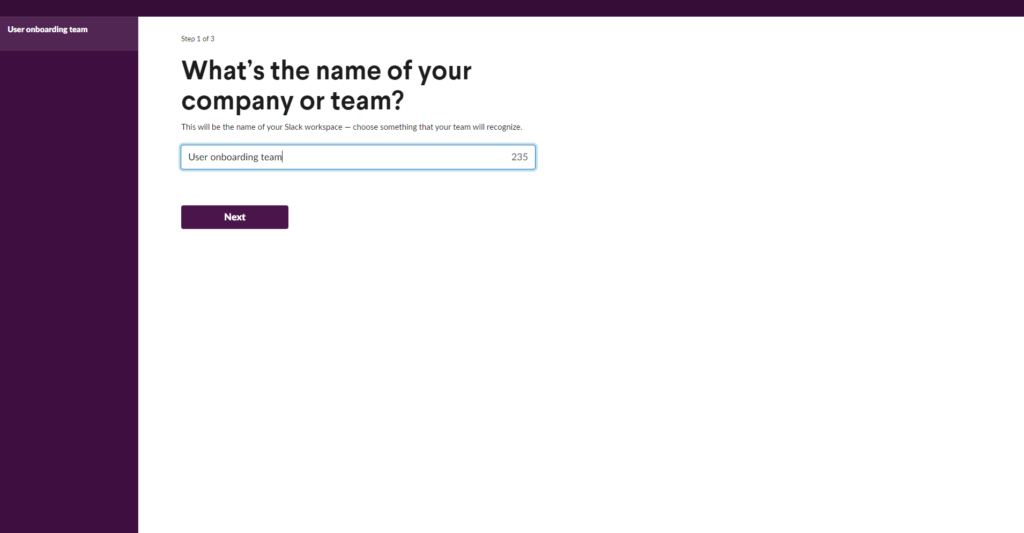
The first step is to sign up to our app. 

You can refer to this short video that goes through all the process of a feature flag setup or read the detailed instructions below.

Creating your feature flag use case 

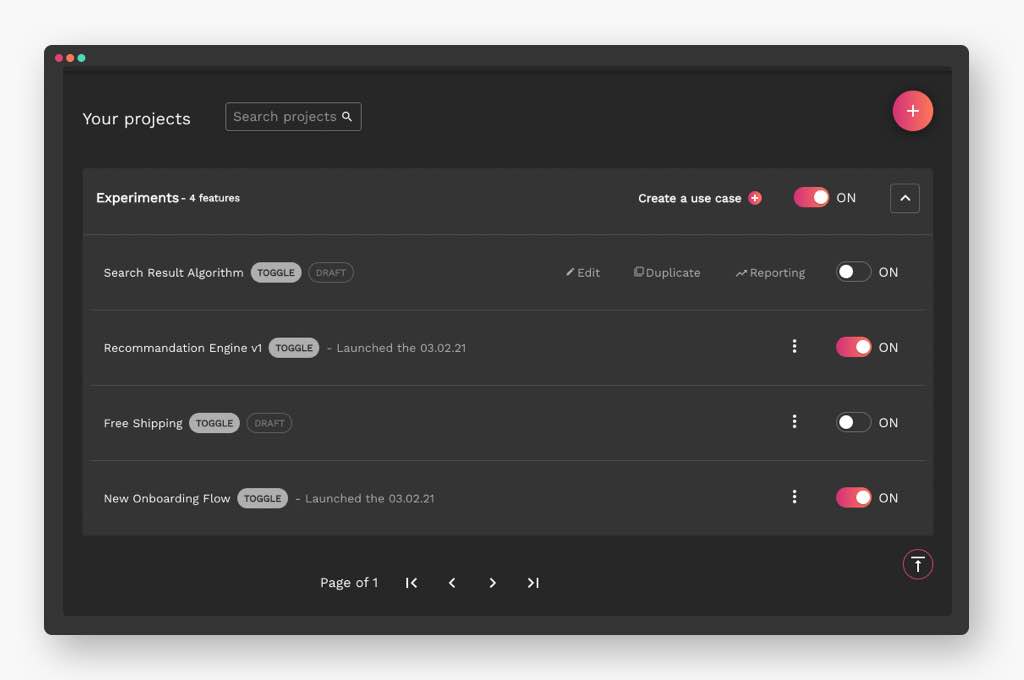
To create a feature flag from the dashboard, apply the following steps:

  1. Go to the dashboard.
  2. Click the + button.
  3. Choose an existing project or create a new one
  4. Click the “Add a use case” button.
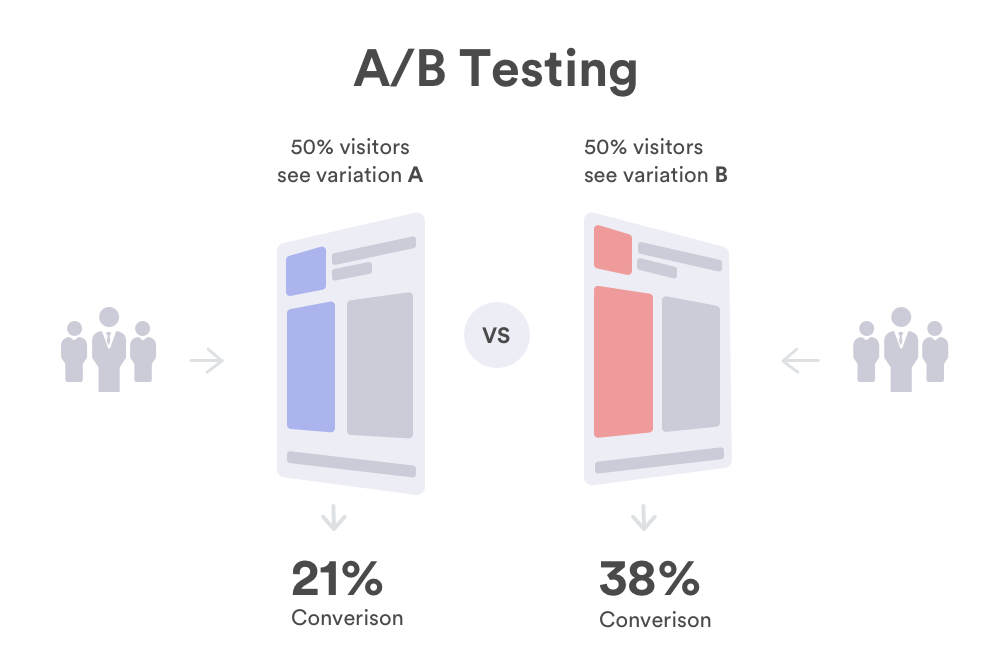
  5. You are presented with a list of different templates or use cases (ex: progressive rollout, A/B test…)
  6. Choose the “Feature toggling” template.

Entering the basic information

First, you need to enter the basic information of your feature flag use case:

  1. The feature name: use the most representative name for your feature, because this is the one you’ll need to remember in case you want to find it later.
  2. The feature description: explain exactly what your feature deployment is about and what its purpose for your business is.
  3. The primary/secondary metric to follow (optional) which will serve as a point of reference to analyze performance. For more information, refer to Configuring KPIs

Defining flags

This is where you configure the flags and their values based on your different scenarios. Think of it as the config file mentioned in the first method, but that you manage remotely from the cloud. Important: flag names you specify here should match the ones used in your codebase (“btnColor” in your code example above).

Defining targeting

During this step, you can define which users will be assigned to your different flag values. This is a segmentation engine built into the platform that makes it easy to assign flags conditionally based on user traits (or attributes) that you have access to in your codebase. Refer to this article about feature flag targeting for more information. The 3 following options are available:

  • All Users if you want all your users to progressively see your feature.
  • Users by ID if you want only users with a specific ID to see your feature.
  • Key if you only want users matching this key value to see your feature.

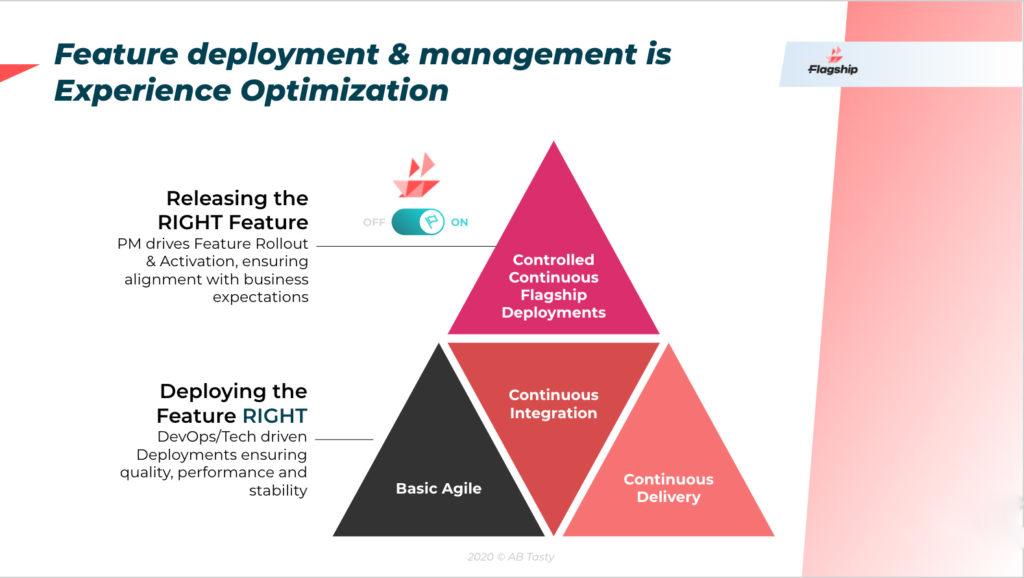
Enabling your feature

Once you have configured your feature, it is OFF by default to allow you to check that it is correctly configured. Back to the dashboard, you can activate your feature ON when you are ready!

And that’s it. Now, provided changes to your codebase have been deployed, you can activate/deactivate feature flags, remotely change their values and have your React App react instantly to these changes.

Last thoughts 

This article describes three ways of implementing feature flags in a React SPA (single-page application):

  • the do-it-yourself method,
  • using open-source libraries,
  • signing up with a dedicated feature management platform.

While there are pros and cons to each approach, the third-party vendor option is probably the most efficient method for large teams with evolving use cases that don’t want to deal with the challenges of an in-house system. For more details, read our article The Journey of Feature Flag Implementation.

Subscribe to
our Newsletter

bloc Newsletter EN

We will process and store your personal data to send you communications as described in our  Privacy Policy.

Article

17min read

Everything You Need to Know About Conversion Funnels

Any business selling products or services online has a conversion funnel — but not everyone realizes it. If you’re unsure what a conversion is or how you can refine yours to sell more online, you’re in the right place. In this post, we’re going to take you through everything you need to know about conversion funnels. We’ll start with the basics — what conversion funnels are and the three key stages — before moving on to some of the most effective strategies to improve your funnels to increase sales. Let’s get stuck in!

In this article, we’ll cover:

[toc]

What is a conversion funnel?

A conversion funnel is a process that takes potential customers on a journey towards buying your products or services. They’re the cornerstone of all e-commerce business models, guiding potential customers from the moment they first become aware of your brand to the moment they make a purchase and beyond.

Conversion funnel schema
Conversion funnel schema (Source)

If you’re new to conversion funnels, think about the shape of a funnel — it’s wider at the top and narrower at the bottom. This represents the flow of people through your marketing strategy. Not everyone who becomes aware of your business will go on to become a paying customer. It’s like brewing coffee using a drip filter — a large volume of coffee grounds go into the top of the brewing equipment and then the funnel filters the high-quality stuff out of the bottom into your mug. A sales funnel works in the same way. The goal is to get as many relevant leads into the top of the funnel as possible, filtering out unsuitable prospects to leave your ideal customers ready to buy from you.

When you optimize your conversion funnel, you maximize the impact of your online marketing strategy and boost sales. This isn’t a once-and-done exercise, but something you need to continually refine throughout your business life. Do you want to know how to do it?

Coffee serveware, funnel
Coffee serveware, funnel (Source)

What’s the difference between a conversion funnel and a sales funnel?

The terms conversion funnel and sales funnel are often used interchangeably, but are they the same thing? The answer to this question is no, although they are closely related. A sales funnel typically starts when a potential customer enters the sales pipeline. This can happen online (in an e-commerce environment) as well as offline. However, a prospect typically doesn’t enter your sales funnel until they’re already familiar with your brand and your products or services.

It can take a while to get to this point in the online world, particularly if you’re targeting people who have never heard of your brand before. It takes time to build a connection and trust with your audience.

This is where a conversion funnel comes in. Here, the focus isn’t just on making a sale. It’s about making a connection with your audience, generating leads, and then taking those leads on a journey with your company. Potential customers might come into your funnel cold, without much awareness of who you are or what you do. Over time, your funnel will warm them up, build trust in your offer, and get them ready to buy. It encapsulates the whole process — from the first contact through to purchasing.

The three conversion funnel stages

There are many different conversion funnel models out there. All of them broadly suggest the same thing: breaking the process down into several conversion funnel stages the leads must travel through before making a purchase. Although a customer may enter or exit the funnel at any stage, your personalized model sets out how you intend customers to connect with your business.

The exact model will look different for every organization, but here are the three stages we suggest you follow.

Stage 1: Building awareness at the top of the funnel

The top of the funnel is all about making people aware of your brand and capturing leads. This stage is arguably the most crucial. If you don’t get people into your funnel, how are you going to sell to them? This critical step is often referred to as the awareness stage, and the exact strategy you use to do this will depend on your ideal customer. Who are they? Where do they hang out? What are their fundamental problems and challenges? Why would they be interested in what you have to offer them? The answers to these questions can provide useful directions during the awareness stage. Remember: this isn’t about you; it’s about the customer. Here are a few things that should be happening at the top of the funnel.

Content marketing

To grab attention online, you’re going to need content. This content can take many forms, so it’s essential to think about the types of content your audience is most likely to consume. For example, TikTok videos will likely appeal to 18 to 24-year-olds, but they might not be the best option if you’re targeting an older demographic.

You should consider both onsite and offsite content when outlining your content marketing strategy. An effective conversion funnel needs both. Offsite content helps capture attention and attract people to your website. In contrast, onsite content engages your audience and encourages them to take the next step, such as signing up for your mailing list.

Marketing campaigns

Alongside your content marketing strategy, you should also consider the marketing campaigns you will be running to get people to engage with this content. How will you get your content seen? How will you capture users’ attention? Are you only operating online, or will you use offline marketing to generate leads?

Often, e-commerce businesses are quick to dismiss offline marketing campaigns as irrelevant. However, highly targeted offline campaigns can be extremely useful. The online marketplace is crowded! If you can think of innovative ways to reach your audience offline and direct them to your online content, it could turn out to be a cost-effective way to generate leads for your conversion funnel.

You could also consider how you might automate some of your marketing campaigns. Creating evergreen campaigns that can run in the background while you and your employees focus on other tasks is useful to maximize profits. In essence, it means you can be generating leads for your business while you sleep.

Lead capture

Lead capture is the final step of the awareness stage. It’s where you move your prospects from the top of your conversion funnel to the middle. Once you’ve directed a potential customer to your website and encouraged them to engage with your content, what’s next? Each piece of content your audience engages with on your website should have a call to action — something that tells them what action to complete next.

To achieve this, you might want to consider a lead magnet. This can be something as simple as a discount code. But, for maximum results, you could develop something that helps solve a problem directly related to the product or service you’re offering.

Not only does this ensure you’re capturing highly qualified leads, but it also means people are likely to sign up even when they’re not ready to make a purchase. Given the point of a conversion funnel is to get them ready to buy from you, this is a vital point to consider when outlining your content marketing strategy.

Once you have that email address, it’s time to move on to the second stage of the conversion funnel: nurturing your audience to build desire for your products or services.

Business dashboard
Business dashboard (Source)

The best ways to build awareness

To maximize the number of leads you’re capturing, you should focus your stage one activities across a range of digital marketing channels. Here are some of the most popular options:

Social media

Given there are almost 4 billion social media users worldwide (over half the world’s population), it’s no surprise social media marketing is one of the most popular ways to generate leads. That said, it’s important to note it isn’t an easy option! Many business owners expect social media to be a fast and cheap way to grow an audience. Still, it takes time and persistent effort to get results — just like any other marketing strategy.

Work with a professional to develop a social media marketing plan that helps you stand out from the crowd. Many businesses use social media to attract people into their conversion funnel, but few do it well.

Paid search

What’s the first place you turn to when you need information? It’s estimated there are around 2 trillion Google searches every year — so advertising your content on Google could potentially be very lucrative! Unlike social media marketing, people using search engines are actively looking for the information you’re providing. To get the best click-through rate, make sure the phrases you’re targeting are directly relevant to the content. And test campaigns with a small budget before increasing your spending.

Organic search

It’s also a good idea to optimize your content for organic search. While this isn’t a short-term strategy, Search Engine Optimization (SEO) can deliver large volumes of traffic to your website over time. Focus on creating evergreen content — content that doesn’t become irrelevant or outdated and can appear in organic searches for many years to come. When you gain website visitors organically from search engines, you improve your ability to build a list of qualified leads, improving the quality of people entering your conversion funnel.

Stage 2: Nurturing your audience

Many online businesses make the fundamental mistake of pushing for a sale too soon. While you can (and should) always have an option for potential customers to buy from you on their terms, you should design your conversion funnel to nurture your leads, building trust with your brand before moving them into the sales pipeline.

Staying in contact

Once a potential customer has told you they want to hear more from you, it’s essential to stay in touch with them. If you can, you should aim to use multiple channels to do this. Encourage them to follow you on social media, re-target them with relevant online content, and send them regular emails. Research consistently shows the more opportunities a potential customer has to engage with your brand online, the more likely they will buy from you.

In short, it’s not enough to let people know you exist. If you want to sell to them, you need to put in the work to keep them engaged!

Positioning your products and services

As you stay in touch and nurture your audience, you should also ensure each lead is familiar with your products and services. This step isn’t about pushing for the sale — we’ll come back to this in the next stage — but you should be introducing your offering interestingly and engagingly. Essentially, we need your leads to be ready to make a purchase when you deliver your sales pitch. To get to this stage, they need to know what you’re selling.

Building a desire to buy

And finally, throughout the nurturing stage, you should be gearing up your audience to perform the desired action. In most cases, this is completing a purchase. How do you do this? Use emotion.

Humans are emotional beings. Remember earlier when we discussed the problems and challenges your product or service can solve for your customers? What are the emotions behind that problem? Aim to appeal to these emotions when engaging with your audience, and make it clear that you’re here to help them overcome these feelings to foster more positive and desirable emotions. How will your product or service make them feel? Can you impart some of these feelings with your content?

As well as feeling emotion, people have an inbuilt desire to be understood. The more you can show them you understand them, the more they will connect with your brand, and the more desire they will have to do business with you.

Throughout this step, you should be keeping your competitors in mind, especially if you’re operating in a competitive niche. Why should your audience choose you above your competition?

Stage 3: Convert potential customers into paying customers

Stage three is what it’s all about — securing the sale. Without this stage, your business is nothing — without paying customers, you have no profits. But we hope you now appreciate why it’s important to take your audience on a journey through the preceding stages before you attempt to convert them. Once you’ve optimized your funnel, your leads will now be ready to buy from you.

Continue to nurture leads

It’s crucial to be aware of this: you don’t stop nurturing your prospects once you get them to the end of your funnel. This stage should continue as long as your leads — and eventual customers — are in contact with your business.

Work at your potential customer’s pace

It’s also important to remember your potential customers will all travel at their own pace. Some will be ready to make a purchase sooner than others. For this reason, you should think of your conversion funnel as a process. It isn’t about throwing leads in at one end and spitting them out at the other side but about fostering connections that will help your organization thrive over time.

If you attempt to trigger a sale, but your customers aren’t ready, you should continue to engage and nurture them — and try again further down the line. Similarly, if none of your prospects are buying from you at this stage in your conversion funnel, it’s a sign something needs tweaking — we’ll get back to this in a little while.

Trigger a Sale

Now it’s time to encourage your leads to become paying customers, but how should you do it? As always, there are many options here. Finding the right approach will likely involve some trial-and-error. It’s a good idea to test out a few sales tactics and see what works. For some, a simple email or retargeting campaign on social media might do the trick. But for other businesses, you might need to come up with something more personal or creative.

What makes a good call-to-action?

Calls-to-action are the lifeblood of any effective conversion funnel. But how can you make sure yours are effective? Here are some tips to get you started.

Be clear and concise

Your call-to-action shouldn’t be too wordy. It would be best if you were direct. Use short sentences and tell your audience exactly what you want them to do. Use verbs like “buy,” “shop,” or “download.” Telling someone to “shop the new collection” is likely to result in more sales than something like “our new collection is now live on our website.”

Ask yourself why

As you develop your call-to-action, put yourself in your potential customer’s shoes. Why should they do what you’re asking them to? This is where the copy in the rest of your sales pitch comes in. The call-to-action is the final piece of the puzzle. By the time your lead gets to this part of your content, they should already be ready to hit that button. Make it a no-brainer for them.

The role of the shopping cart

The shopping cart on your website can be one of your biggest assets for driving sales. Did you know you can follow up on abandoned carts with your email subscribers? If not, you’re missing out on one of the most effective conversion tools available to e-commerce businesses. Research suggests around 70% of all shopping carts are abandoned online. Think about it: these are leads that have been through the conversion funnel and are almost ready to make a purchase. What is it that stopped them? It might have been something as simple as an interruption. Get back in touch and ask them if they’re ready to complete their purchase. The results may surprise you.

Evaluating your funnel with conversion funnel metrics

As we mentioned at the start of this post, a conversion funnel isn’t something you can create and then forget about. It’s an ongoing, interactive process that you must refine over time. The digital marketing world is dynamic and ever-changing — and your conversion funnel will need to evolve alongside industry trends and technological advances. Evaluating your funnel is an essential part of this, enabling you to improve each stage of the process to generate more qualified leads and convert more of them into paying customers.

Your first step should be to set up Google Analytics to track your conversion funnel. When you do this, you can track a lead from the moment they join your funnel until they make a purchase. This gives you an overview of how well your funnel is performing, as well as helping you access some of the key conversion funnel metrics that help you decide what to focus on next, such as:

Cost per acquisition (CPA)

Marketing costs money and the expenses associated with your conversion funnel can quickly mount up. It’s vital to understand the benefit these investments bring. What is the return on investment (ROI) associated with your conversion funnel? To understand this, you need to calculate your cost per acquisition. To calculate this, divide the costs associated with your conversion funnel by the number of paying customers the funnel generated in the same time period. For example, if you invested $500 and generated 10 paying customers, your CPA would be $50.

You can then compare this with the average spend to figure out whether your conversion is profitable or not. Using the example above, if the average customer spends $200, your funnel is profitable. On the other hand, if the average lifetime spend is $20, the funnel is operating at a loss.

Conversion rate

Google Analytics calculates your funnel’s conversion rate by working out how many of the visitors went to the goal page (e.g., “thank you for your purchase”) as well as one of the pages associated with the earlier stages of your conversion funnel. This provides you with useful insight into how well your funnel is working over time, which can help you evaluate any changes that you make to optimize the funnel.

Are you ready to optimize your funnel?

In summary, conversion funnels are an essential asset to all e-commerce businesses. If you want to improve sales, optimizing your funnel is often the best place to start. What steps will you take after reading this post?